Blog · Workflow
Explain It Once: The Annotated Screenshot That Replaces the Meeting
Half of “got five minutes for a quick call?” is really “I can't point at the thing.” You can point at the thing.
Every workplace has the recurring scene: something looks wrong on someone’s screen, they try to describe it in words — “the thing under the second box, near the sidebar, but only after you scroll” — the other person sees something else, and the conversation ends in a calendar invite. The problem was never the explanation. It’s that the explanation was written for a thing neither of you can point at. A marked-up screenshot points.
What a bare screenshot can’t say
A raw capture says “look at all of this” — which is the same as saying nothing. What’s missing is the pointing: here, not there; before, not after; this part and definitely not that part. The fix takes one minute:
- An arrow or two — the single highest-value mark. One arrow replaces a paragraph of spatial description.
- Numbers for sequences — when there are several things, number them: ① click here, ② change this, ③ it should look like this.
- A blur over the private parts — names, invoice totals, customer rows. Twenty percent of people admit they’ve shared a screenshot with something sensitive on it; a blur region takes five seconds and removes the whole category of accident.
- A box, not words — if you catch yourself adding a text label longer than the thing it labels, just box the thing.
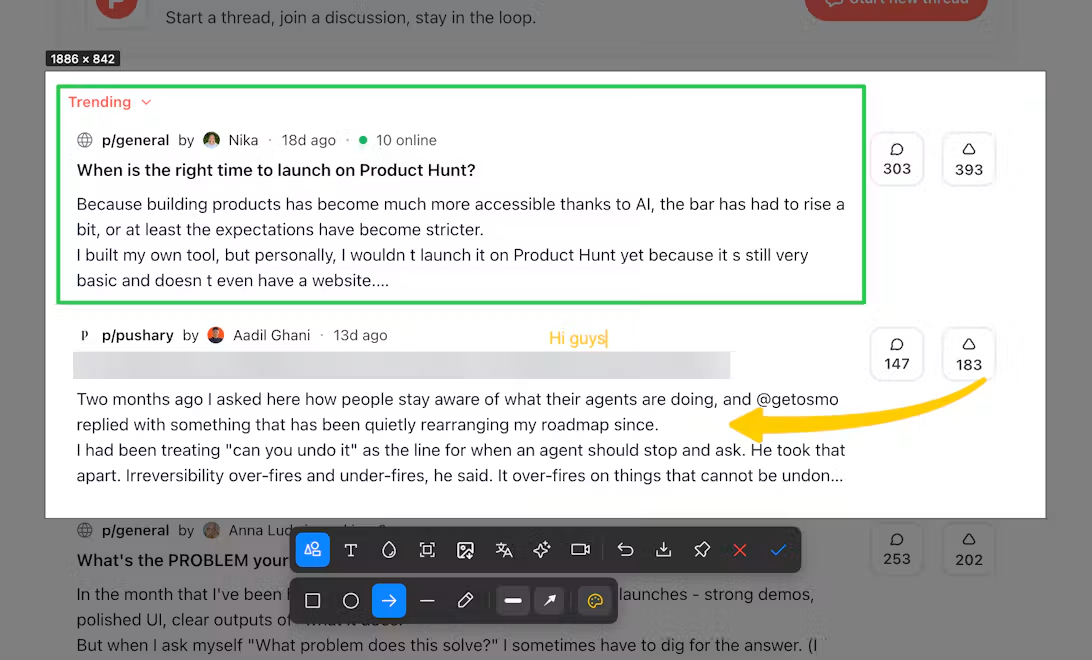
The 60-second version
In iShot the markup rides on the capture — no separate editor pass. Take the shot, the toolbar is already there: arrow, box, number, blur. Draw the two marks that matter, blur the one private cell, hit copy, paste it into the thread. If the tools should stay put for the next shot, they do — 1.6.17 made the tools stay on, so a five-screenshot walkthrough doesn’t mean re-picking the arrow five times. The full tool-by-tool version lives in the annotation guide.
Make the answer stay put
Two quiet features turn this from a trick into a habit. Pin keeps the marked screenshot floating above your windows while you check the claim against the real UI — no window-toggling. And when the explanation spans several shots, clipboard history keeps every capture from the session so you can paste them in order instead of hunting the desktop for Screenshot 2026-11-03 at 10.42.11.png.
Frequently asked questions
What’s the fastest way to annotate a screenshot on a Mac?
Use a capture tool with a built-in markup toolbar — iShot puts arrows, boxes, numbers, and blur directly on the screenshot the moment you take it, so annotate-and-send is one flow. Preview’s markup tools also work, with a save-and-switch step.
How do I hide sensitive info in a screenshot before sending it?
Blur the region in the capture tool before it ever leaves — iShot’s blur is drawn as a region on the screenshot, so the data isn’t just covered, it’s unreadable in the exported image. Don’t rely on a sticky note or a colored box layered on top.
Is an annotated screenshot better than a screen recording?
For a single state — “this setting, this value” — the marked image wins: it answers at a glance, in any chat client, forever. For anything that moves (a flow, an animation, a bug that reproduces over time), record the screen with a camera bubble and send both.